Thursday, January 28, 2016

FreeRTOS - Coding Standard and Styling

This post is heavily based on the official webpage [1] and I guess it couldn't be very different. This time we'll understand a few things on how the code is written, for instance, what's up with the 'x' in front of xTaskCreate() or the 'ul' in ulValueToSend. First of all, we should have in mind that the FreeRTOS is coded in C language according to MISRA guidelines [2], which I don't know at all, but I'm sure we can get what they mean.

Naming Convention

Variables:

  • uint32_t: prefix 'ul', as in 'unsigned long'
  • uint16_t: prefix 'us', as in 'unsigned short'
  • uint8_t: prefix 'uc', as in 'unsigned char'
  • Non standard types: prefix 'x' or 'ux', when unsigned. Examples:
    • BaseType_t (used on xTaskCreate)
    • QueueHandle_t (used on xQueue)
    • TickType_t (used on xNextWakeTime)
  • Enumerated: prefix 'e'
  • Pointers have an additional prefix 'p'
Functions:
  • Private functions (file scope static only): prefix 'prv'. Examples:
    • prvQueueReceiveTask: the Receiver
    • prvQueueSendTask: the Sender
  • FreeRTOS API functions: prefixed according to its return type (see Variables) or 'v', as in 'void'; after this prefix, the name of the .c file where it is defined. Examples:
    • xTaskCreate: non standard type, defined on task.c
    • xQueueCreate: non standard type, defined on queue.c
    • vTaskStartScheduler: void type, defined on task.c
Macros:
  • Prefixed with the file where it is defined, in lowercase
  • Its name must be written in uppercase
  • Examples:
    • configMINIMAL_STACK_SIZE, configASSERT: defined in FreeRTOSConfig.h
    • mainQUEUE_RECEIVE_TASK_PRIORITY: defined in main.h (or .c, or in the case of Blinky, main_blinky.c)
    • pdMS_TO_TICKS: define in projdefs.h
    • portMAX_DELAY: defined in portmacro.h

Data Types

There are a few (4) special data types largely used:
  • TickType_t: if configUSE_16_BIT_TICKS != 0, then it's an unsigned short (16 bits), otherwise, it's an unsigned long (32 bits)
  • BaseType_t: the most efficient data type for the architecture (for 32-bit architectures, it's a signed 32 bit type; for a 16-bit, it's a signed 16 bits, etc)
  • UBaseType_t: just an unsigned BaseType_t
  • StackType_t: used internally by the FreeRTOS, has the width of the memory where the stack is located (usually 16 bits for 16-bit architecture and 32 bits for 32-bit)

Style Guide

This is something in which I believe a lot. Having a style, preferably a simple one makes the code much easier to read, which facilitates maintenance. FreeRTOS has its own rules:
  • Indentation with TABs (4 spaces)
  • Comments with '//' and don't pass column 80, unless after a parameter describing it
  • The layout must be easy to read (check FreeRTOS webpage for details [3])


Wednesday, January 27, 2016

Understanding Blinky - part 2


This post will discuss the FreeRTOS itself. One of its main capabilities is to simulate a multitasking. We know each processor core can only be processing one task at a time, but when you change the task being processed quickly enough, you can pretend that all are being processed at the same time. FreeRTOS does that with the use of the scheduler, which is basically the piece of code that will choose which task will run. Every once in a while, the scheduler will stop the current task execution and handle the processor's control, along with the task's stack, to another task, that eventually will be stopped (or will hold its own execution, i.e. through a delay) and another will be assigned and so on.

http://www.freertos.org/implementation/a00004.html

Stack

Each task usually needs some memory to store some variables. This memory, on bare metal projects, is usually the RAM itself, with a well defined address within it. When talking about an RTOS, the RAM is divided into pieces, called stacks [1], and each piece will hold the task's memory (the size of the piece is defined when the task is created, on xCreateTask()'s parameters). This piece will also hold a few more information relevant to the task, such as the point where the code was stopped the last time, the processor's registers values, etc, thus it needs a minimal size, which is defined, in Blinky project, as configMINIMAL_STACK_SIZE. The developer should always think well how much memory the task needs in order not to have problems. The stack is usually bigger than it actually needs, as you better spare memory and don't have a stack overflow problem. Other points to be reviewed before determining the size are [2]:

  • The function call nesting depth
  • The number and size of function scope variable declarations
  • The number of function parameters

Priorities

Imagine you have three tasks running the whole time doing what they're were meant to do. When one task execution is stopped, how does the scheduler choose which task will run next? If the tasks have different priorities (defined on xCreateTask()'s parameters), then the highest priority will run [3]. Care must be taken in this situation, otherwise, one task may never run (imagine two tasks that never stop executing by they're own have higher priority than another: when one task is running, the other is always waiting in front of the line, so that the lowest priority is always in the back and never runs). The lowest priority is defined by tskIDLE_PRIORITY and the higher the number, the higher the priority.

Task states

I've talked about a few of the states, like when the task is blocked (for example, when the Sender stops for a delay), running or waiting to be executed, so let's check those states thoroughly [4]. The tasks can be in 4 states: Running (it is using the processor), Ready (it is waiting to be processed), Blocked (it is waiting for some event, temporal - such as a delay - or external - such as a queue or semaphore event; in this case, it is not running nor waiting to be processed) or Suspended (it explicitly entered this state through the function vTaskSuspend() and can only exit by another explicit call of the function xTaskResume(); in this state, it is also not running nor waiting to be processed).
The task will enter the Ready state when it is created, when the scheduler stops its execution, when the event that was blocking it occurs or when it exits the Suspended state. It will only enter the Running state when the scheduler says so.

http://www.freertos.org/RTOS-task-states.html

Idle Task

If there are no tasks on Ready state (waiting to run), there is always one simple task, with lowest priority level possible that will use the processor: the Idle Task [5]. Basically, what it does is to free the memory from deleted tasks (if there are any and if your application allow that). When at least one task has the priority as the Idle, it is possible to tell the Idle task to yield the execution as soon as possible when these other tasks are in a Ready state [6]. It is possible to run some code whenever the Idle Task is called by the use of the Idle Task Hook, although it is imperative that the function doesn't block the task (for instance, using a vTaskDelay() or waiting for a semaphore), if that is the case, you should write a task with the Idle Task priority (this will use more RAM, but will permit more flexibility).

configASSERT()

This function is quite important during the development phase. It is often used to check if the task execution is OK and can continue. For instance, when the Sender and Receiver tasks check whether the parameters are right, it does so with the use of the configASSERT() [7]. This function will call another function when there is a problem: vAssertCalled(), which, in this project, will stop the execution and place the application on a loop. This function should be written by the developer in order to facilitate the debug of the code. When the project is mature enough, it can be suppressed to avoid code overhead.


[1] http://www.freertos.org/Stacks-and-stack-overflow-checking.html
[2] http://www.freertos.org/FAQMem.html#StackSize
[3] http://www.freertos.org/RTOS-task-priority.html
[4] http://www.freertos.org/RTOS-task-states.html
[5] http://www.freertos.org/RTOS-idle-task.html
[6] http://www.freertos.org/a00110.html#configIDLE_SHOULD_YIELD
[7] http://www.freertos.org/a00110.html#configASSERT

Monday, January 25, 2016

Understanding Blinky - part 1

Ok, all compiled, all working, but nothing was truly understood. Let's dig through Blinky's code and study a bit about how does it work. It probably won't make much difference, but I'll be using the Eclipse + MinGW version to explain. Just for me to remember, this project creates two tasks and a queue. One task is the Sender (it posts a message on the queue) and the other is the Receiver (it receives the message from the queue and prints another message on the screen).

main_blinky()

We'll start checking main_blinky() function (main_blinky.c, line 162), since I believe it's a little more practical than going through FreeRTOS' main() function. The first thing it does is to create a queue (xQueueCreate() [1]), with mainQUEUE_LENGTH positions (1 position only), each of them with sizeof( unsigned long ) bytes (in my case, 4 bytes). A queue is a simple way to send messages from one task to the other, usually used as a FIFO. In this case, the queue identifier (xQueue) is a global variable that can be used by both tasks.

Moving on, the tasks are created with xTaskCreate() and the parameters are [2]:

  • A pointer to the function that implements the task (prvQueueReceiveTask for the Receiver and prvQueueSendTask for the Sender)
  • The name of the task, only used for easier debug ("RX" and "TX")
  • The size of the stack, in Words (configMINIMAL_STACK_SIZE for both, which is 50 Words, or 200 bytes, since each Word is 4 bytes wide)
  • A pointer to the parameter(s) sent to the task (mainQUEUE_RECEIVE_PARAMETER and mainQUEUE_SEND_PARAMETER, used just to show how the functionality works; it is important to notice that the content must exist during the entire time the task is running, thus declaring it static is a good idea, otherwise, the task could access some address that no longer exists)
  • The priority of the task (mainQUEUE_RECEIVE_TASK_PRIORITY for the receiver and mainQUEUE_SEND_TASK_PRIORITY for the sender; in this case, the receiver has a higher priority and both the task have priorities higher than the Idle Task, which has the lowest possible priority)
  • A handler to the task, which can be used to check if the task was created, to delete the task, usw. (this is not used on Blinky).
Finally, the scheduler is started and the main_blinky ends on an endless loop.

prvQueueSendTask

The Sender uses a few local variables: xNextWakeTime, which holds the moment, in ticks, when the task will wake up; ulValueToSend, which holds the value to be stored on the queue; and xBlockTime, which stored the amount of time, in ticks, that the task will be sleeping (blocked state - 200 ms). The task starts by checking whether the parameters are right using the configASSERT() function, and if they're not, it will stop the execution. The xNextWakeTime is initialized with the amount of ticks since the scheduler started (xTaskGetTickCount()). The endless loop contains a delay function (vTaskDelayUntil()), which receives as parameters the previous wake time (currently stored on xNextWakeTime) and the amount of ticks the task will remain in blocked stated (xBlockTime), and the post-to-queue funtion (xQueueSend(), which is equivalent to xQueueSendToBack(), thus using the queue as a FIFO [3]), which receives as parameters the handler/identifier of the queue (xQueue, the global variable), the value to be sent (ulValueToSend - the value will be copied to the queue) and the amount of time, in ticks, that the function should wait if the queue is full (for Blinky, the queue should always be empty by the time this function is called, so the wait period is zero).

prvQueueReceiveTask

The Receiver only uses one local variable: ulReceivedValue, which will be filled with the valued stored on the queue. Similar to the Sender, the first action is to check whether the parameters received by the task are right and stop the execution in case they're not. The endless loop will receive the value from the queue and, if the value is right, will print a message. The function used to receive is xQueueReceive() [4], which receives as parameters the handler/identifier of the queue (xQueue), a place to store the value read (ulReceivedValue) and the amount of time, in ticks, it will wait in blocked mode until there is something on the queue (portMAX_DELAY, which is the maximum amount of time possible; and, as INCLUDE_vTaskSuspend is set to 1 on FreeRTOSConfig.h, the task may wait forever, or actually until the Sender posts a messsage). The rest of the task is pretty straight forward.


Idle Task? Scheduler? Blocked mode? Scenes for our next episode...

Friday, January 15, 2016

First steps: Arduino Blinky and FreeRTOS on Windows

First of all, you should buy your Arduino. Their site sells the real deal [1], but I guess an Aliexpress copy will do the trick just as fine. With the board in hand, download and install the Arduino IDE [2].

The first project to test will be the Blink Project! So open the IDE, connect the USB cable to the board and your computer, select the correct board, processor and port under the Tools menu. Under File, select Examples -> 01.Basics -> Blink. Scroll down the source code and you'll see the setup() function, that's where you put sources you want to run one once (like setting the LED pin 13 as an output), and the loop() function, where you maddest ideas are written (this function will run in a loop, endlessly).

To compile your code and send it to the board, either click on the second button from left to right (the one with the arrow), click on Upload under the Sketch menu. If everything went well, the LED on your board will be blinking.


If you're not used to programming Arduino, I strongly recommend you read a lot on Arduino's webpage ([3] and [4]), as I don't pretend to describe what each function does and how it does what it does.

As for FreeRTOS, there are several books regarding it, but I' always try to use the free contents you find around. So first of all, check the official website [5]. One of the first things you'll see is that there is a lot to read! But don't worry, I'll try to guide you by less-reading path.

First thing: download FreeRTOS ([6] - I'm currently using version 8.2.3) and, if you don't have any version installed, the free version of Microsoft Visual Studio ([7] - I'm currently using version 2015 for Desktop). Yes, Visual Studio. FreeRTOS has a port to Windows that won't be as accurate when speaking of Real Time, but will serve its purpose of test platform and first try. Every port of the RTOS has a Demo project, which serves as a fast start, containing a complete documentation [8]. There is also a way of using Eclipse with MingW and I'll talk about it later.

On Visual Studio, open the file Win32.sln located on FreeRTOS/Demo/WIN32-MSVC and on the Solution Explorer tab (on the right), open main.c and main_blinky.c under RTOSDemo/Demo App Source. On the first, set the definition mainCREATE_SIMPLE_BLINKY_DEMO_ONLY to 1. There are two Demos: when the option is 0 (default), it runs the code from main_full.c, a more comprehensive demo project; when it's 1, it will run a simple Blink project. The simple project will run two tasks and a queue (check it on the function main_blinky() on main_blinky.c): one task (prvQueueSendTask, the Sender) will send the value 100 to the other (prvQueueReceiveTask, the Receiver) through the queue (xQueue). When the Receiver receives the value, it will print a message on the terminal. Now press the Play button (Debug -> Start Debugging) and a terminal window will appear and the Receiver will start writing its messages.


Now, for Eclipse, this is the recipe: download and install both Eclipse IDE for C/C++ [9] and MinGW's C++ compiler [10]. Start Eclipse, go on File -> Import -> General/Existing Projects. On the new window, choose FreeRTOS/Demo/WIN32-MingW as the root directory and finish. The rest is the same as for Visual Studio. To start debugging, first build the project (Project -> Build All, or CTRL + B) and then run (Run -> Debug, or F11): the execution will be shown on the lower side of the Debug perspective (tab "Console") and will stop as soon as it enter the main() function. Press Run -> Resume (F8) and check the messages from the Receiver.


Thursday, January 14, 2016

All aboard!

First of all, the RTOS implementation I chose is FreeRTOS [1]. I don't know exactly why. It just appeared a lot in my studies, it seems to be free and there is a lot of material around. I guess I just had to start somewhere. I surely can implement my own, and maybe one day I'll do that, but starting on something already established, tested and proven to work is much easier, at least when you don't have a lot of experience on the field.


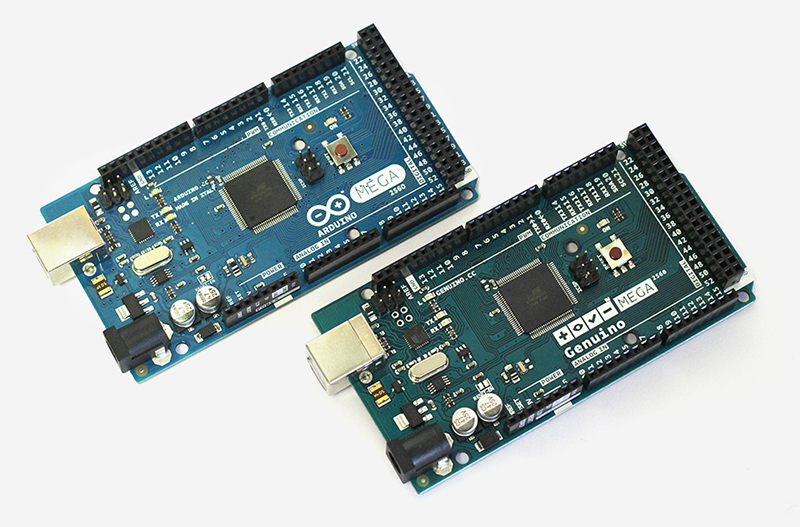
The hardware I chose is the ArduinoMega2560 (actually a Chinese version of it I bought from Aliexpress a while ago). I know Arduino is not the first choice for most professional developers, as they say it hides too much, it abstracts the hardware too much, and I think that's true. I wouldn't make a product based on an Arduino board with software developed on Arduino's IDE, as I believe you're not really in control of your hardware, so weird stuff may happen. Nevertheless, my opinion on Arduino is that it is one of the greatest platforms for testing algorithms, proving concepts and learning new stuff. I know there are a lot of other development boards from all vendors you can imagine that do exactly the same thing Arduino does, but I haven't found one as cheap and available. The amount of peripherals available out there is amazing! From a single button to Ethernet or Wifi connection, Bluetooth, ZigBee, all kinds of motor controllers, 7-seg displays, LCD displays, fire detector, accelerometer, GPS, GPRS und so weiter und so fort. Even Arduino has several versions, from very simple 8-bit microcontrollers with 16KB of Flash and 1KB of RAM (Arduino Nano) to 32-bit ARM Cortex-M3 with 512KB of Flash running at 84MHz (Arduino Due).
As I'm not interested in learning (more) about the microcontroller itself but on the application (RTOS), using Arduino seemed like a good option. I can learn about it all I want, abstracting the hardware, and when I get to the point where porting it to a new hardware is interesting, I'll check under the hood. Arduino MEGA 2560 is based on Atmel's ATmega2560 [2]: 256KB of Flash, 8KB of SRAM, 4KB of EEPROM, 16MHz and a lot of internal peripherals. The Arduino board [3] has 54 I/Os (15 may be PWM outputs), 16 analog inputs and 4 UARTs. SPI and I2C are also supported. Power comes from an external adapter (12V) or from the USB connection and is converted to 3.3V by an in board regulator, thus Vin (from the adapter), 5V and 3V3 are available to the user.


Enough chit-chat!

[1] http://www.freertos.org/
[2] http://www.atmel.com/devices/ATMEGA2560.aspx?tab=overview
[3] https://www.arduino.cc/en/Main/ArduinoBoardMega2560